
Hey there! Today, I’m sharing a dessert recipe that will make you wonder why you didn’t make this sooner honeycomb ice cream! If you’re a fan of sweet, creamy ice cream with a delicious crunch, this one’s for you. I made this for a special date night and it truly stole the show! The best part? It’s made with the help of my Ninja Creami, which made the whole process super simple. So, get ready to dive into a dessert that’s rich in flavor and texture. Here’s how you can make this amazing treat at home!
Method
1. Prepare the Base Mixture
Start by grabbing your blender or food processor. Add 400ml of semi-skimmed milk, 60g of condensed milk, 45g of smooth chocolate protein powder, and 45g of Horlicks powder into the blender. Blend everything together until the mixture is smooth and well combined. This is the key to getting a creamy ice cream base, so make sure everything is blended perfectly with no lumps.
2. Freeze the Mixture
Once your mixture is smooth, transfer it into a container that’s safe for the freezer. Place the container in the freezer and let it freeze for at least 24 hours. This step is essential to help the ice cream freeze properly, creating the perfect consistency.
3. Thaw and Process the Ice Cream
After 24 hours, take the container out of the freezer. Let it sit at room temperature for a few minutes to soften slightly. This will make it easier for your Ninja Creami (or any ice cream maker) to process. Once softened, transfer the mixture into your Ninja Creami and select the ‘Ice Cream’ function. The machine will process the mixture into smooth, creamy ice cream in just a few minutes.
4. Adjust Consistency if Needed
If you find that your ice cream isn’t as soft as you’d like, add a small drop of milk and use the ‘Respin’ function. This will help smooth out any remaining ice crystals and make the ice cream softer. If your ice cream already looks great, you can skip this step!
5. Add Mix-Ins
Once your ice cream is ready, create a well in the center and add in crushed biscuits, chocolate pieces, or any other sweet additions you love. You can be creative here think crushed cookies, candy bits, or even a little caramel drizzle. Select the ‘Mix-In’ function to evenly distribute your toppings throughout the ice cream.
6. Serve and Enjoy
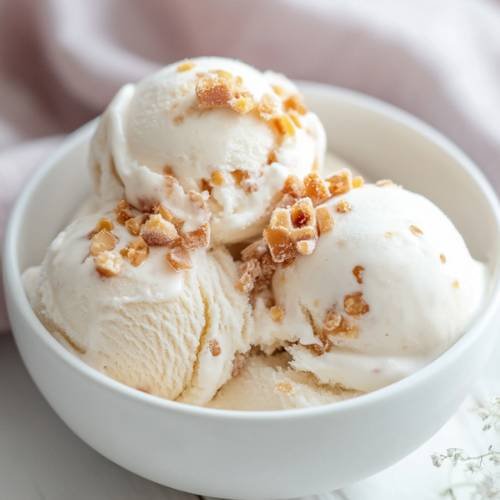
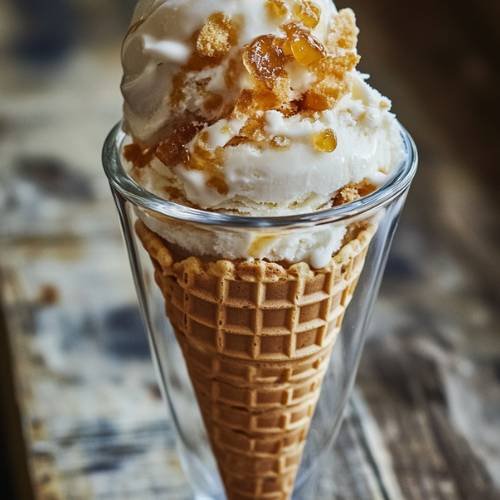
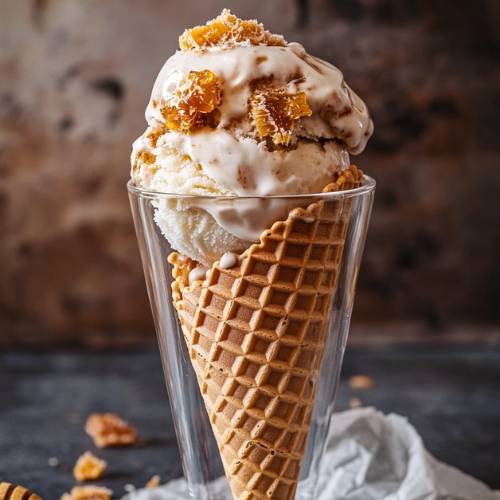
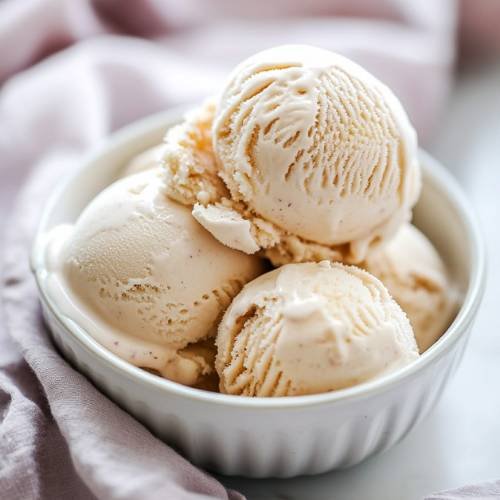
Once everything is mixed in, your honeycomb ice cream is ready to enjoy! Scoop it into bowls or cones, and you’re all set for a delicious, homemade dessert!
Necessary Tools
- Blender or food processor
- Ninja Creami (or any ice cream maker)
- Freezer
- Spoon or ice cream scooper
Honeycomb Ice Cream Recipe – The Creamiest, Dreamiest Treat!
Difficulty: Easy6
servings10
minutes24
hours24
hours10
minutesIngredients
400ml semi-skimmed milk
60g condensed milk
45g protein powder (smooth chocolate flavor)
45g Horlicks powder
Directions
- First, grab your blender or food processor. Add in the semi-skimmed milk, condensed milk, protein powder, and Horlicks powder. Blitz it all together until smooth!
- Once everything is combined, transfer the mixture to a container and freeze it for at least 24 hours. Patience is key here, but trust me, it’s so worth it!
- After 24 hours, remove the mixture from the freezer. Let it thaw for a few minutes.
- Place the mixture in your Ninja Creami (or ice cream maker), and select the ‘Ice Cream’ function. This should take just a few minutes.
- If you like your ice cream a little softer, you can add a small drop of milk and use the ‘Respin’ function. However, my ice cream turned out perfect without that extra step!
- The fun part make a little well in the center and add crushed biscuits or chocolate of your choice.
- Use the ‘Mix-In’ function to combine everything and voilà, your honeycomb ice cream is ready to enjoy!
Notes
- Make sure the ice cream has enough time to freeze for at least 24 hours; this is crucial for the perfect texture.
- When blending, ensure all ingredients are well combined, or you might end up with lumps in your ice cream.
- Don’t be tempted to skip the thawing step before using the Ninja Creami. The texture might not come out as creamy if it’s too frozen.

Serving Suggestions
Serve your honeycomb ice cream in bowls or cones for the perfect treat. It’s delicious on its own, but if you want to take it to the next level, drizzle some caramel sauce or sprinkle extra crushed biscuits on top. For a fun twist, top it with a few pieces of honeycomb candy or some fresh fruit!
Fun Fact
Did you know that Horlicks, the malted milk powder in this recipe, was originally created in the late 1800s to help with digestion? It’s not only tasty but has some health benefits too!
Conclusion
If you’re looking for a dessert that’s both indulgent and easy to make, this honeycomb ice cream recipe is a must-try. With just a few simple ingredients and the help of the Ninja Creami, you can enjoy a delicious, creamy treat right at home. Whether you’re serving it at a party or just treating yourself after a long day, this ice cream is sure to impress!