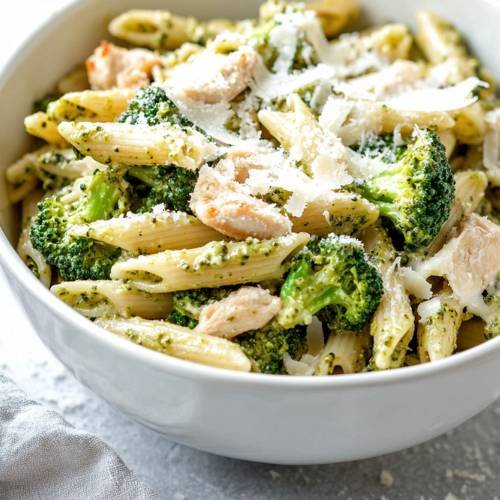
Hey there! If you’re like me and love a tasty pasta dish that sneaks in some veggies, then this Cheesy Broccoli Pesto Pasta is a game-changer. Whether you’re trying to get more greens into your kids’ meals or just want to enjoy a creamy, cheesy pasta without the guilt, this recipe has got you covered. Plus, it’s high in protein, so it’ll keep you full and satisfied, even without the chicken (though I highly recommend it if you’re craving some extra protein). Let’s dive into this delicious recipe!
Method
Start with the Broccoli
Begin by microwaving the broccoli for about 3 minutes until it softens. This will make it easier to blend into the pesto sauce. Once the broccoli is softened, transfer it into a frying pan along with the pine nuts. Toast the pine nuts in the pan for a couple of minutes, stirring occasionally to ensure they don’t burn but get a nice golden color. This step brings out the nutty flavor of the pine nuts, which will complement the creamy pesto sauce.
Make the Pesto Sauce
Now it’s time to make the pesto. Set aside a few toasted pine nuts to use as a topping later. In your blender or food processor, add the remaining pine nuts, the cooked broccoli, fresh basil leaves, garlic cloves, skimmed milk, and most of the parmesan cheese. Blend everything together until smooth and creamy. If the mixture is too thick, you can always add a little extra milk to get your desired consistency. Once blended, taste the pesto and add salt and pepper if necessary.
Cook the Chicken and Pasta
While you’re making the pesto, it’s time to cook the chicken and pasta. In the frying pan that you used for toasting the pine nuts, heat a bit of oil or spray to prevent sticking, and fry the diced chicken breast. Stir frequently to ensure the chicken cooks evenly and reaches an internal temperature of 165°F (75°C). In a separate saucepan, bring water to a boil and cook your pasta according to the package instructions, making sure to cook it al dente (slightly firm) so it doesn’t become too soft once mixed with the pesto. Once the pasta is cooked, drain it, but save a bit of pasta water in case you need it to adjust the sauce later.
Bring Everything Together
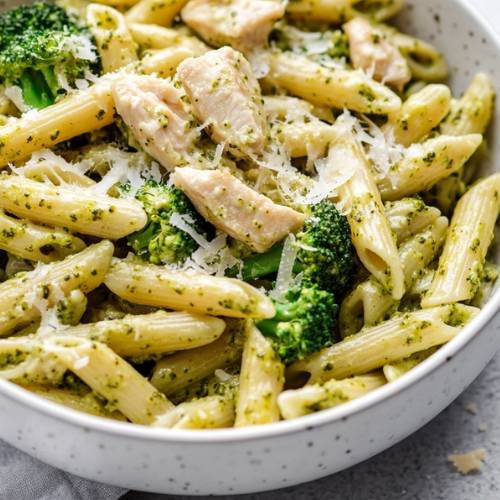
Once the chicken and pasta are both cooked, it’s time to combine everything. Pour the creamy pesto sauce over the hot pasta, then toss in the cooked chicken. Add the cream cheese and cheddar cheese into the pasta and toss everything together until the cheese melts into the sauce and creates a rich, creamy texture. If you find the sauce is a bit too thick, add a small amount of the reserved pasta water to loosen it up.
Finish It Off
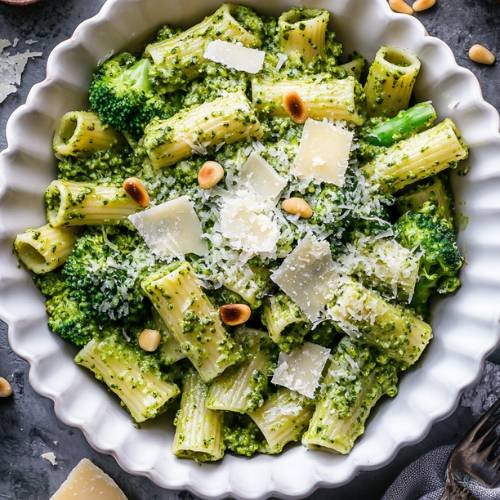
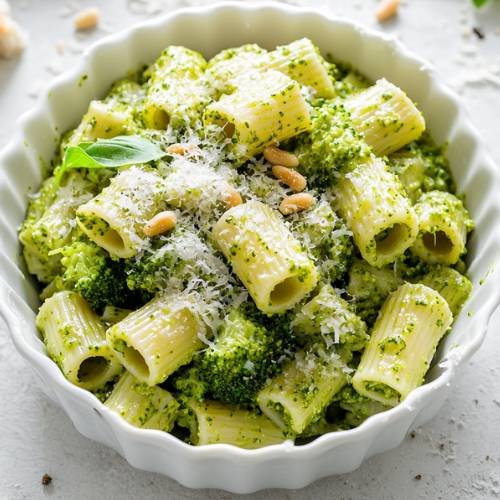
To give the dish that perfect finishing touch, sprinkle the remaining parmesan cheese over the pasta, then top with the reserved toasted pine nuts. The crunch of the pine nuts adds a delightful texture contrast to the creamy pasta. Serve it hot, and enjoy your Cheesy Broccoli Pesto Pasta!
Necessary Tools
- 1 large microwave-safe bowl for the broccoli
- 1 frying pan for the chicken
- 1 saucepan for boiling pasta
- Blender or food processor for making the pesto
- 1 large mixing bowl
- A spatula or spoon to stir everything together

Cheesy Broccoli Pesto Pasta A Flavorful Twist for Sneaky Veggie Lovers
Cuisine: AmericanDifficulty: Easy4
servings10
minutes20
minutes30
minutesIngredients
40g pine nuts
230g broccoli
350g (raw) diced chicken breast
400g pasta (I love using penne or fusilli)
30g fresh basil
2 garlic cloves
200ml skimmed milk
40g parmesan cheese
25g lightest cream cheese
50g 50% fat cheddar cheese
Handful of spinach
Directions
- Start with the broccoli Microwave the broccoli for 3 minutes until it’s softened, then throw it into a frying pan with your pine nuts for a couple of minutes to toast them slightly.
- Make the pesto sauce Set a few toasted pine nuts aside for topping later. Blitz the rest of the pine nuts, broccoli, fresh basil, garlic, skimmed milk, and most of the parmesan in a blender or food processor until smooth.
- Cook the chicken and pasta In the pan where you toasted the pine nuts, fry off your diced chicken breast until it’s cooked through. At the same time, boil your pasta in a separate saucepan until al dente.
- Bring it all together Once the pasta and chicken are cooked, pour the pesto sauce over the pasta, toss in the cheeses (cheddar and cream cheese), and season with salt and pepper to taste.
- Finish it off Top your pasta with the remaining parmesan cheese and the reserved pine nuts. Serve hot, and enjoy!
Notes
- Pesto thickness The pesto sauce should be smooth, but if you prefer a creamier consistency, feel free to add a bit more milk or cream cheese.
- Pasta cooking time Be sure to cook your pasta al dente (slightly firm) so it doesn’t get soggy when tossed with the sauce.
- Chicken cooking Make sure your chicken is cooked thoroughly, but be careful not to overcook it, or it might become dry.
- Blender consistency If your pesto sauce is too thick, add a little more milk to help blend everything smoothly.
Serving Suggestions
This Cheesy Broccoli Pesto Pasta is a meal on its own, but if you’re looking to add a side, consider serving it with a crisp green salad or some garlic bread. For an even heartier meal, serve it with some roasted vegetables or grilled chicken.
Fun Fact
Did you know broccoli is packed with Vitamin C, fiber, and antioxidants? It’s an amazing veggie for boosting your immune system and promoting overall health. Plus, blending it into this pesto sauce is a sneaky way to get kids (or anyone!) to eat more of it without even knowing!
Conclusion
This Cheesy Broccoli Pesto Pasta is not only delicious but also a great way to sneak some nutritious vegetables into your diet (or your kids’ diet). With creamy pesto, hearty chicken, and a cheesy finish, it’s a meal that’s sure to please everyone at the table. Give it a try, and I’d love to hear how it turns out for you! Let me know if you made any fun tweaks to the recipe too. Happy cooking!