
Hey food lovers! These Cheesesteak Ciabatta Sliders are the perfect blend of juicy ribeye steak, melted cheese, and soft ciabatta bread. Trust me, these sliders are UN-REAL! They’re hearty, satisfying, and packed with flavor. Plus, the cheesy sauce takes them to a whole new level of deliciousness. So, let’s dive in and make these mouth-watering sliders together!
Method
Sautéing the Vegetables
Start by heating half of the olive oil in a frying pan over medium heat. Add the chopped onion and green pepper to the pan and sauté them, stirring occasionally. Once the vegetables have softened, which should take around 10-15 minutes, add the garlic, salt, pepper, and a small splash of water. Continue cooking until the vegetables are tender and caramelized, absorbing all the flavors. Set the sautéed veggies aside in a separate bowl for later.
Preparing the Steak
While the vegetables are cooking, take the ribeye steak and slice it into very thin strips aim for around 2mm if possible. The thinner the strips, the quicker they’ll cook, ensuring they stay tender and juicy. Season the steak strips with salt and pepper to enhance the flavor.
Cooking the Steak
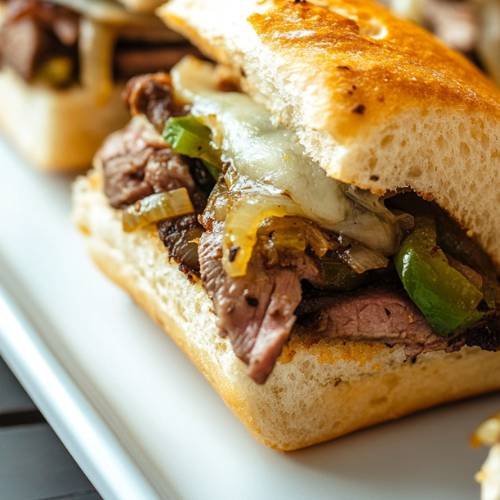
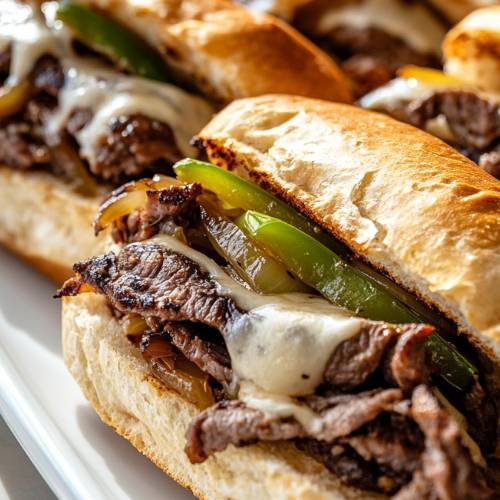
After setting aside the sautéed vegetables, return the frying pan to the heat and add the remaining olive oil. Once the oil is hot, add the seasoned steak strips to the pan. Cook the steak for a few minutes, stirring occasionally, until it is browned and cooked through. It’s important to not overcook the steak to keep it tender. Once cooked, remove the steak from the pan and set it aside with the veggies.
Assembling the Sliders
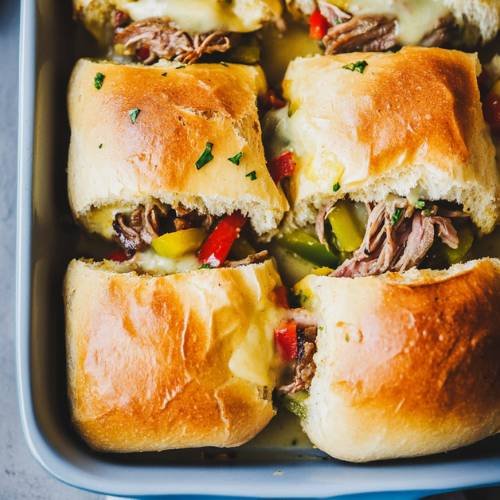
Preheat your oven to 180°C (350°F). Take your heat-and-eat white baguettes and slice them in half. Place the bottom halves of the baguettes in a baking dish. Layer each baguette with slices of mozzarella cheese, followed by the cooked ribeye steak and sautéed veggies. The combination of melted mozzarella and the steak mixture will form the core of the sliders, providing a deliciously rich flavor.
Making the Cheese Sauce
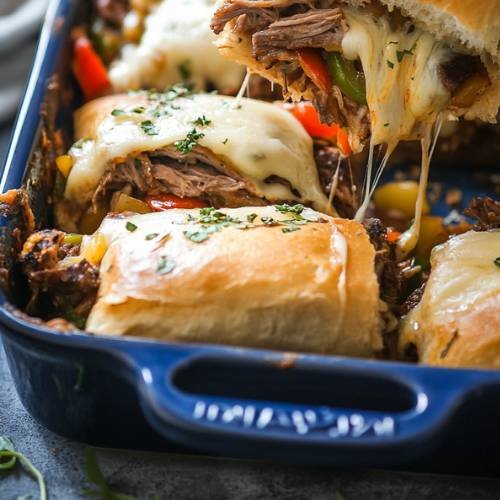
In a small saucepan, combine the skimmed milk, cheesy slices, mozzarella slice (or leftover mozzarella), and lightest cream cheese. Heat the mixture on low, stirring constantly until the cheese has fully melted and the sauce is smooth. Once the cheese sauce has reached the desired consistency, pour it evenly over the steak and veggie-filled baguette bottoms, ensuring each slider is generously coated with cheesy goodness.
Brushing and Baking
Place the tops of the baguettes onto the assembled sliders. In a microwave-safe bowl, melt the light flora for about 10-15 seconds. Once melted, mix in the garlic and chopped parsley. Brush this flavorful mixture generously over the tops of the baguette sliders. This will add a crispy, savory coating to the buns while they bake.
Baking the Sliders
Cover the baking dish with foil to trap moisture and heat, allowing the sliders to bake evenly. Place the dish in the preheated oven and bake for 10-15 minutes. For the best results, I recommend baking with the foil for the first 5-10 minutes, then removing it for the final 5 minutes to allow the tops of the sliders to turn golden and crispy. The result will be perfectly baked, cheesy, and irresistible sliders!
Necessary Tools
- Frying pan
- Baking dish
- Saucepan
- Microwave-safe bowl
- Oven

Cheesesteak Ciabatta Sliders A Delicious Twist on a Classic!
Cuisine: American, ItalianDifficulty: Easy2
servings15
minutes20
minutes35
minutesIngredients
1 onio
1/2 a green pepper
1 tbsp onion granules
Salt and pepper, to taste
500g ribeye steak (from Lidl)
1/2 tbsp olive oil
2 ‘heat and eat’ white baguettes (from Tesco)
90g mozzarella slices
For the cheese sauce
80ml skimmed milk
2 cheesy slices
1 mozzarella slice (I just added whatever was leftover!)
15g lightest cream cheese
For brushing on top
50g light flora
1/2 tsp garlic
A bunch of chopped parsley
Directions
- Start by frying the onion and green pepper in half of the olive oil over a medium heat. Add the garlic, salt, pepper, and a splash of water. Let it cook for 10-15 minutes until everything softens up.
- Slice the ribeye steak into very thin strips (around 2mm if possible) and season with salt and pepper.
- Set the veggies aside, and in the same pan, add the remaining oil. Fry the steak for a few minutes until it’s cooked through.
- Now, in a baking dish, lay the bottom of the baguettes. Top them with mozzarella, then the steak and veggies.
- In a saucepan, heat the milk and cheeses on low until they melt together and form a smooth sauce. Pour the cheese sauce over the steak.
- Place the tops of the baguettes on and brush with melted flora mixed with garlic and parsley (I heat the flora for 10-15 seconds in the microwave for an easier brush).
- Cover the sliders with foil and bake in the oven at 180°C for 10-15 minutes. I recommend baking for 5-10 minutes with foil, then removing the foil for an additional 5 minutes to get that golden, crispy top!
Notes
- Be sure to slice the steak thinly so it cooks quickly and stays tender.
- If you’re not using a microwave to melt the flora, make sure to melt it properly in a bowl to avoid clumps.
- Watch the baking time closely; you don’t want to overcook the sliders and lose that cheesy goodness!
Serving Suggestions
Serve these cheesy sliders with a side of crispy fries, a fresh salad, or some roasted veggies. You can also dip them in some tangy barbecue sauce for extra flavor!
Fun Fact
Did you know that Philly cheesesteaks originated in Philadelphia, Pennsylvania in the 1930s? Now, they’re enjoyed all around the world, and this ciabatta slider version is a fun twist on the classic!
Conclusion
These Cheesesteak Ciabatta Sliders are the perfect comfort food for any occasion. With tender steak, melted cheese, and soft ciabatta bread, this recipe will quickly become a family favorite. Plus, they’re so easy to make, you’ll be enjoying them in no time. Happy cooking!