
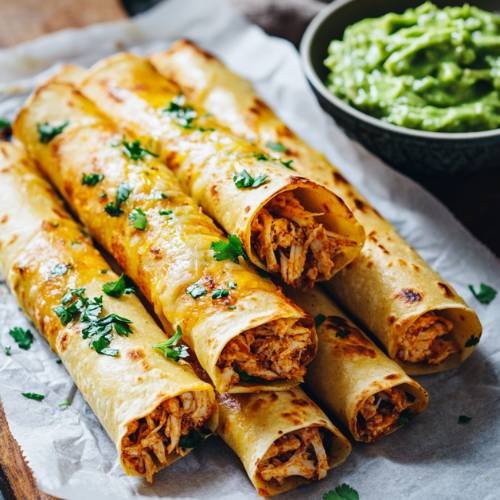
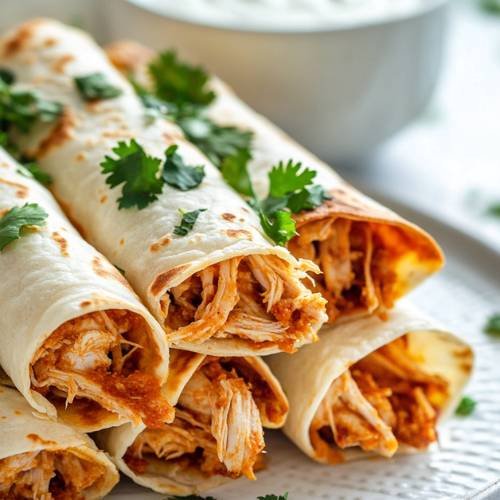
Let me tell you these garlic and paprika pulled chicken taquitos are one of my favorite easy meals. They’re crispy on the outside, cheesy and juicy on the inside, and packed with bold, smoky flavor. If you’re looking for something fun to make for dinner (or a snack!), this one’s a total winner. Bonus they freeze well and taste even better dipped in guacamole or sour cream. Let’s dive in!
Method
Season the Chicken
Start by placing your raw chicken breasts into a large mixing bowl. Add 1 teaspoon of sweet paprika, a good pinch of salt, some freshly ground black pepper, and 1 tablespoon of olive oil. Use your hands or a spoon to coat the chicken evenly with the seasoning. This will help build a rich, smoky base flavor. Once the chicken is fully coated, cook it using your preferred method you can bake it in the oven, air fry it, or pan-fry it on the stovetop. Just make sure it’s fully cooked through (no pink in the middle). After cooking, let it rest for a few minutes. This short cooling time keeps the chicken juicy and also makes it easier to shred or chop into bite-sized pieces.
Make the Sauce
While the chicken is cooling, it’s time to get the sauce going. Heat the remaining 1 tablespoon of olive oil in a medium pan over medium heat. Once hot, add your finely chopped red onion. Cook it for 2 to 3 minutes, stirring often, until it softens and becomes slightly translucent. Then toss in the minced garlic and cook for about 30 seconds just until fragrant. Now, pour in the 400ml of tomato passata and 60ml of water. Stir everything together, then sprinkle in the garlic and paprika taco seasoning mix. Let the sauce simmer gently for about 5 to 6 minutes. This allows the flavors to come together and gives the sauce a thick, rich texture.
Mix it All Together
Once your sauce has simmered and thickened a bit, add the shredded chicken into the pan. Stir it well so every piece of chicken is coated in that flavorful sauce. Then, sprinkle in your grated cheese (about 70 to 80 grams) and stir again until the cheese starts to melt into the mixture. The result should be a creamy, cheesy chicken filling that smells amazing and holds together nicely when spooned into tortillas.
Build the Taquitos
Now it’s time to roll! Lay out all 10 of your mini wheat and corn tortillas on a clean surface. Spoon a generous line of the cheesy chicken mixture across the center of each tortilla try not to overfill, as this can make rolling tricky. Once filled, roll each tortilla up tightly, just like a burrito but thinner. Place each one seam-side down in a greased baking tray or casserole dish. If you want extra cheesiness, sprinkle a bit more grated cheese over the top of the rolled taquitos before baking.
Bake
Preheat your oven to 170–180°C (that’s about 340–355°F). Once hot, slide your baking tray into the oven and bake the taquitos for 10 to 15 minutes. You’ll know they’re ready when the tortillas are crisp on the edges and the cheese on top is melted and golden. If you like them extra crispy, you can switch on the broiler for the last 1–2 minutes but watch them closely so they don’t burn!
- Mixing bowl
- Pan for cooking sauce
- Knife and chopping board
- Baking tray or casserole dish
- Oven or air fryer
- Spoon or spatula for mixing
- Forks for shredding chicken

Garlic and Paprika Pulled Chicken Taquitos
Cuisine: MexicanDifficulty: Easy4
servings15
minutes30
minutes45
minutesIngredients
600g raw chicken breast
1 tsp sweet paprika
Salt and black pepper (to taste)
1 red onion, finely chopped
3 garlic cloves, minced
1 packet of garlic and paprika taco seasoning
400ml tomato passata
60ml water
70–80g grated cheese
10 mini wheat and corn tortillas
2 tbsp olive oil
Optional for serving sour cream, homemade guacamole, avocado crema
Directions
- Season the Chicken
Add the raw chicken to a mixing bowl with paprika, salt, pepper, and 1 tablespoon of olive oil. Mix it up so the chicken is well coated. Then cook it bake, pan-fry, or air fry until it’s fully cooked. Let it cool for a few minutes, then shred or chop it into bite-sized pieces. - Make the Sauce
Heat the remaining tablespoon of olive oil in a pan. Toss in your chopped red onion and sauté for 2–3 minutes. Add the minced garlic and cook for a few seconds until it smells amazing. Then stir in the tomato passata, water, and garlic-paprika taco seasoning. Let it simmer for 5–6 minutes. - Mix it All Together
Add the shredded chicken and grated cheese into the sauce. Stir everything until it’s well combined and the cheese starts to melt into the mix. - Build the Taquitos
Lay out your tortillas. Spoon a generous line of the filling across each one. Roll them up tightly and place them seam-side down in a baking tray or casserole dish. Sprinkle extra cheese on top if you’d like (I always do). - Bake
Preheat your oven to 170–180°C (around 340–355°F). Bake the taquitos until the edges are crispy and the cheese on top is melted. This usually takes about 10–15 minutes.
Notes
- Place them seam-side down to help them stay closed while baking.
- Roll tightly so they don’t fall apart in the oven.
- Make sure your chicken is fully cooked before mixing it into the sauce.
- Don’t overfill the tortillas or they may burst open while baking.
- Let the chicken cool slightly before shredding it’ll be easier and juicier.


Serving Suggestions
These taquitos are so good on their own, but even better with
- A dollop of sour cream
- Fresh guacamole
- Avocado crema
- Salsa or pico de gallo
- A side of Spanish rice or a crisp salad
You can even dip them in ranch or cheese sauce if you’re feeling fancy!
Fun Fact
The word taquito means “little taco” in Spanish! They’re also called “rolled tacos” and were first made popular in Southern California. But now? You can find them in kitchens everywhere!
Conclusion
These garlic and paprika pulled chicken taquitos are crispy, cheesy, and full of flavor. They’re super easy to make, perfect for sharing, and guaranteed to be a hit whether it’s dinner, lunch, or even a party snack. I love keeping a few extras in the freezer for a quick bite later. Trust me, once you try them, you’ll want to make them again and again!