
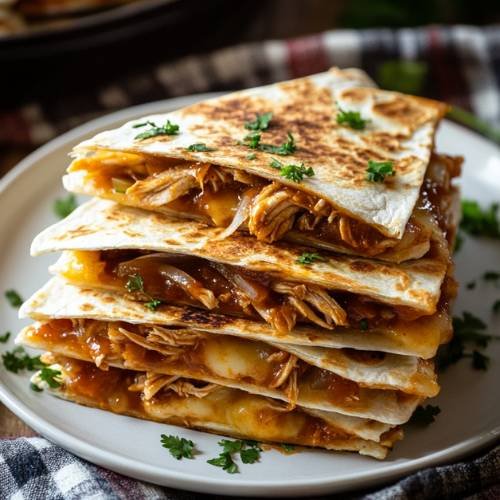
Let me tell you, I’ve been on a serious toasted wrap kick lately and these BBQ chicken quesadillas might just be my favorite one yet. They’re crispy on the outside, gooey and smoky inside, and best of all? You don’t even need to wash the pan between steps (seriously, keep it dirty). It’s one of those super easy meals that tastes way fancier than it is.
Method
1.Make the Chicken Mix
To start things off, grab a non-stick frying pan and place it over medium heat. Add your chopped chicken breast and cook it until it’s almost done just lightly golden and no pink in the center. Now, toss in your chopped peppers and sliced onion. Let everything cook together for a few more minutes until the veggies soften and start to get a little color. Once they’ve softened, squeeze in a small amount of tomato purée and stir it through the mix. Add a splash of passata, followed by a dash of Worcestershire sauce, and then finish it off with a teaspoon of BBQ sauce. Stir well and let the whole mix bubble away until it thickens and turns sticky. You want the sauce to cling to everything and not be too wet this helps avoid a soggy quesadilla later. Once the mix looks rich and glossy, remove it from the heat and let it cool slightly while you get your wrap ready.
2.Assemble the Quesadilla
Lay your wrap out flat on a cutting board. Take your slightly cooled chicken mixture and spoon it onto one half of the wrap don’t go all the way to the edge, or it’ll leak out while cooking. Sprinkle your grated cheddar cheese right over the chicken mix, making sure it covers everything evenly. Once the filling is in place, fold the wrap over into a half-moon shape, pressing gently to hold it together. It’s important not to overfill, or flipping it later will be a bit of a mess!
3.Toast the Quesadilla
Now for the magic part toasting. Take that same pan you used to cook the chicken (yep, don’t wash it!) and spray a little Frylight or your favorite cooking spray into it. Place the folded quesadilla in the pan and set the heat to medium. Let it cook for about 2 to 3 minutes on the first side. Use a spatula to gently press it down so it gets nice and crispy. When it’s golden brown underneath, carefully flip it over and repeat on the other side. Be gentle use a wide spatula and take your time flipping so it doesn’t fall apart. Once both sides are crisp and the cheese is melted, remove the quesadilla from the pan and let it sit for a minute before slicing.
4.Make the Chips (Optional but Delicious!)
If you’re going all-in and want the full plate, chop up about 200g of potato into small chunks no need to peel unless you want to. Pop the potato pieces into a microwave-safe bowl and microwave them for 5 minutes to soften them up. Once they’re tender, spray them with Frylight and season with salt, pepper, and Cajun seasoning. Give them a little shake or stir to coat them well. Transfer the seasoned potatoes to your air fryer and cook at 190°C for about 20 minutes, shaking halfway through. They should come out perfectly golden and crispy on the outside and fluffy on the inside ideal for dipping or scooping up any cheesy leftovers.
Necessary Tools
- Non-stick frying pan
- Spatula
- Grater
- Sharp knife
- Chopping board
- Microwave (for chips)
- Air fryer (or oven if needed)

BBQ Chicken Quesadillas – Crispy, Cheesy, and So Dang Good
Cuisine: MexicanDifficulty: Easy1
servings10
minutes10
minutes20
minutesIngredients
For the BBQ Chicken Mix
1 small chicken breast (chopped into chunks)
1/3 red or green bell pepper (chopped)
1/3 onion (sliced or diced)
1 squidge of tomato purée
A splash of passata
A dash of Worcestershire sauce
1 tsp BBQ sauce
For the Quesadilla
1 wrap
30g 50% fat cheddar cheese (grated)
Frylight spray (or any light cooking spray)
For the Chips (optional but highly recommended)
200g potato (chopped into small chunks)
Salt, pepper, and Cajun seasoning
Frylight spray
Directions
- Make the Chicken Mix
In a pan, cook your chopped chicken breast until nearly done. Add in your peppers and onions and cook everything until softened. Squeeze in some tomato purée, pour in a splash of passata, a dash of Worcestershire sauce, and your BBQ sauce. Let it bubble until it gets nice and thick and sticky. - Assemble the Quesadilla
Take your wrap and spoon the chicken mix onto one half. Sprinkle the cheese over the top. Fold the wrap in half like a taco. - Toast It
Here’s the fun part don’t clean the pan! Spray some Frylight into the same pan you cooked the chicken in and place your folded wrap inside. Toast it on medium heat for about 2–3 minutes per side or until golden and crispy. - Make the Chips (Optional)
Microwave your chopped potato chunks for 5 minutes. Then spray with Frylight, season with salt, pepper, and Cajun spices, and pop them in your air fryer at 190°C for about 20 minutes. Shake halfway through. They’ll come out perfectly crisp every time.
Notes
- Don’t overstuff the quesadilla too much filling and it won’t crisp up right or will fall apart when flipping.
- Let the chicken mix cool just slightly before placing it on the wrap so it doesn’t make it soggy.
- Be gentle when flipping! Use a wide spatula and flip with confidence.
- Use medium heat, not high, or the outside will burn before the cheese melts.
Serving Suggestions
- Add a side of sour cream or Greek yogurt for dipping.
- A small salad with ranch or creamy slaw works really well.
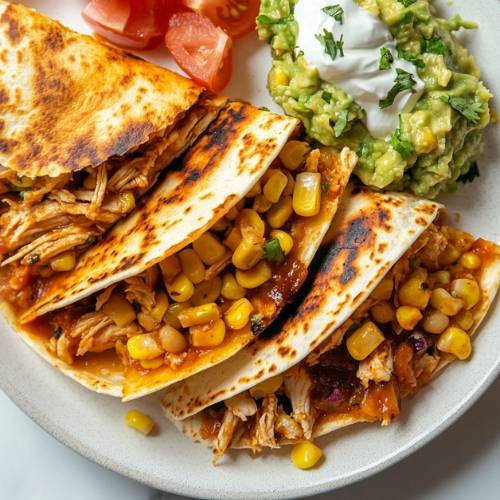
- Turn it into a wrap-meal combo with a side of guac and salsa.
- Want it spicier? Toss in some jalapeños or a dash of hot sauce.
Fun Fact
Did you know that quesadilla means “little cheesy thing” in Spanish? That’s literally what this is a little cheesy thing packed with BBQ flavor and joy.
Conclusion
This BBQ chicken quesadilla is my go-to when I want something cozy, cheesy, and quick. It’s made with stuff I already have in the fridge, comes together in one pan (yay for less washing up), and tastes like something from a fancy café. Give it a try and don’t forget to use that “dirty” pan. That’s the magic.